Picture this: You’ve watched your mycelium colonize perfectly, spreading like white lightning through your substrate. You’re pumped, ready for mushrooms… and then nothing happens. Sound familiar? Here’s the thing—without the right fruiting conditions, your fungi will happily stay in their cozy mycelial state forever.
That’s where fruiting chambers come in. Think of them as climate-controlled mushroom nurseries that trick your mycelium into thinking, “Hey, it’s time to make some mushrooms!” But here’s the kicker: not all fruiting chambers are created equal. Some growers swear by their high-tech setups while others harvest pounds using nothing fancier than a plastic tub with holes.
So which one’s right for you? Let’s break down the most popular options, from dead-simple to seriously sophisticated.
What Is a Fruiting Chamber and Why Do You Need One?
Here’s a mind-blower: mushrooms are basically 90% water. That’s why they need insanely high humidity (we’re talking 80-95%) to form properly. But—and this is where newbies often mess up—they also need fresh air. Too much CO2 and you’ll get sad, stretchy mushrooms desperately gasping for oxygen.
In the wild, mushrooms have it figured out. They wait for that perfect post-rain moment when the air is thick with moisture but still fresh and moving. Your job? Recreate that magic in a box.
The beautiful part is that whether you’re examining spore syringes under a microscope or growing gourmet varieties from liquid cultures, the principles stay the same: humidity, fresh air, and the right temperature. Master these three elements, and you’ll be swimming in mushrooms.
Shotgun Fruiting Chamber (SGFC): The Classic Choice

Ah, the SGFC—the trusty Honda Civic of fruiting chambers. It’s not fancy, but damn if it doesn’t get the job done every single time. This bad boy has been cranking out mushrooms since before the internet existed, and there’s a good reason it’s still around.
The name comes from all those holes you’ll drill—it literally looks like someone went to town on a plastic tub with a shotgun. But don’t let the crude appearance fool you. This design is genius in its simplicity.
How It Works
Here’s where it gets cool (literally). Fresh air sinks in through the bottom holes because it’s denser than warm air. As it passes through your humid chamber, it picks up moisture from the perlite, warms up, and rises—carrying away CO2 through the top holes. No fans, no timers, just physics doing its thing 24/7.
The damp perlite? That’s your humidity engine. As water evaporates from those tiny volcanic rocks, it creates a perfect mushroom spa atmosphere. Simple, effective, and practically bulletproof.
Construction and Costs
Ready to build one? You can knock this out in an afternoon for less than the cost of a decent pizza delivery. Here’s your shopping list:
– Clear plastic storage tub (50-90 liters) – $10-20
– Drill with 1/4 inch bit – Borrow from your neighbor
– Perlite (coarse grade, not the dust) – $15
– Spray bottle for misting – $3
– Wire rack or jar lids to elevate substrate – Free if you’re creative
The tedious part? Drilling holes every 2 inches on ALL six sides. Yes, even the bottom. Put on a podcast and embrace the zen of repetitive drilling. Pro tip: Do this outside unless you enjoy vacuuming plastic shavings.
Once your tub looks like Swiss cheese, dump in 4-5 inches of damp perlite (not soaking—think wrung-out sponge). Pop your colonized blocks on something elevated above the perlite, and boom—you’re in business.
Best Use Cases
The SGFC is an absolute beast for side-fruiting mushrooms. Got king oyster or blue oyster blocks? This chamber will treat them like royalty. Shiitake logs? Perfect. Lion’s mane looking for a home? You’ve found it.
Why does it work so well? These mushrooms LOVE fresh air, and the SGFC delivers it in spades. That constant passive airflow keeps CO2 from building up, which is exactly what these oxygen-hungry species crave. Plus, if you’re running PF tek cakes or just dipping your toes into cultivation, this chamber is forgiving enough to handle beginner mistakes.
Maintenance Requirements
Here’s the catch—SGFCs need daily love. You’ll be misting and fanning 2-4 times a day, which sounds annoying until it becomes your meditation practice. Seriously, there’s something oddly satisfying about watching those tiny water droplets sparkle on mushroom caps.
Weekly perlite check: squeeze a handful. If water drips out, you’ve overdone it. If it feels bone dry, time for a spritz. The sweet spot? Damp like morning grass.
Smart growers position their SGFC where it catches natural air currents—near (not directly under) a ceiling fan or in a room with good circulation. Let physics be your co-pilot.
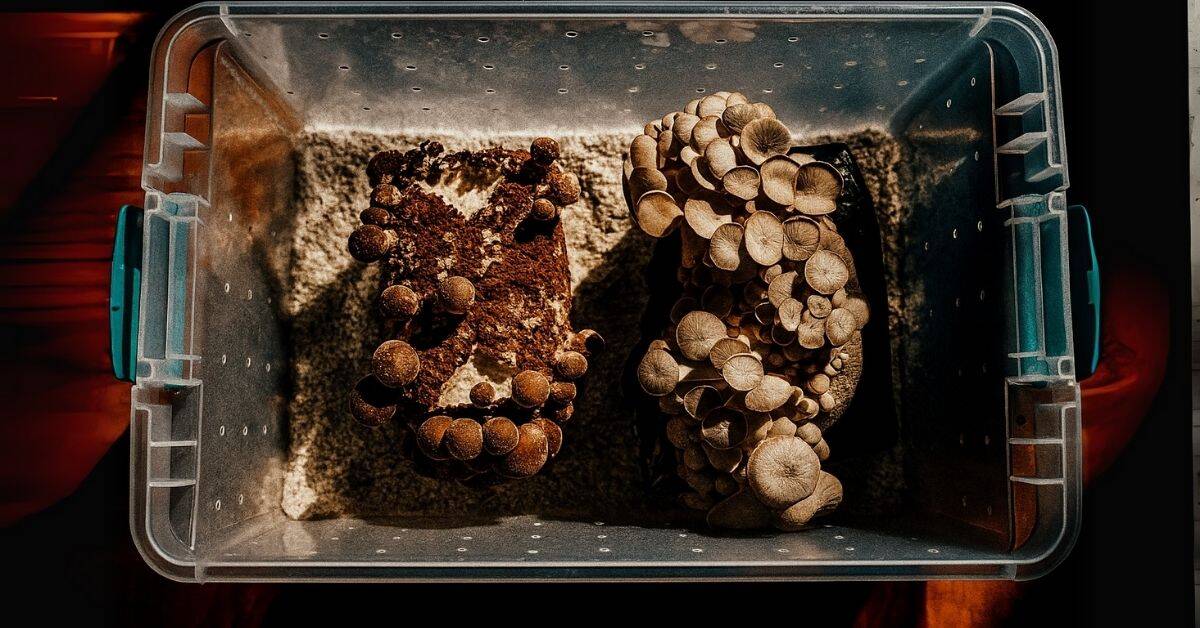
Monotub: The Set-and-Forget Champion
Now we’re talking. If the SGFC is a Honda Civic, the monotub is a Tesla on autopilot. This beautiful invention came from growers who asked the golden question: “What if I’m lazy but still want tons of mushrooms?”

The answer? Create a self-regulating ecosystem in a box. No daily misting, no fanning, just occasional check-ins to harvest your bounty. For busy people or those growing at scale, monotubs are an absolute game-changer.
Design Philosophy
The genius of monotubs lies in their “set it and forget it” approach. Instead of you controlling humidity, the substrate itself becomes the moisture source. As water slowly evaporates from your colonized grain/coir mix, it creates perfect conditions inside the tub.
Those strategically placed holes? They’re not random. Lower holes let fresh air in right at substrate level where mushrooms form, while upper holes vent out CO2. Stuff them with polyfill (yes, pillow stuffing) or slap on some micropore tape, and you’ve created a semi-permeable membrane that self-regulates airflow. It’s basically mushroom engineering at its finest.
Setup Costs and Materials
Building a monotub is stupid cheap for what you get:
– Large clear storage tub (66+ quarts) – $15-25
– Polyfill or micropore tape – $5-10
– Black trash bag for liner (optional but smart) – $2
– Drill or soldering iron for holes – Already in your garage
Total damage: $20-50 for a chamber that can pump out pounds.
Hole placement is where people get religious. The standard approach? Two 1.5-2 inch holes about 4 inches from the bottom on the long sides, plus a couple smaller ones up top. But here’s the thing—your climate matters. Dry desert air? Smaller holes or more micropore tape. Humid coastal environment? Go bigger or use loose polyfill.
Ideal Applications
This is where monotubs really flex. They’re absolutely perfect for top-fruiting species that emerge from a flat substrate surface. For those studying Psilocybe cubensis strains under the microscope, monotubs provide incredibly consistent research conditions.
But the real magic happens when you go bulk. Mix your colonized grain spawn with pasteurized coco coir, add some vermiculite for moisture retention, and watch the magic unfold. One monotub can easily hold 10-15 pounds of substrate, translating to serious yields over multiple flushes. We’re talking efficiency that would make a factory manager weep with joy.
Common Modifications
Once you catch the monotub bug, modifications become an obsession. Here’s what the tinkerers are doing:
Climate Control Freaks add adjustable ports—think little sliding windows you can open or close based on conditions. Dry winter air? Close them up. Humid summer? Let it breathe.
The Automation Army goes full cyborg with:
– Computer fans on timers for perfect air exchange ($20)
– Reptile heating mats for temperature control ($15)
– Humidity sensors with digital readouts ($15)
– Some madlads even hook up Arduino boards for full environmental automation
Sure, you might spend $50-100 on upgrades, but when you’re harvesting quarter-pounds per flush, who’s counting?
Martha Tent: The Professional’s Playground
Welcome to the big leagues. The Martha tent got its name from Martha Stewart’s little greenhouse that some genius mycologist looked at and thought, “I could grow a metric ton of mushrooms in that.” And they were right.
This is where hobby meets hustle. We’re talking multiple shelves, automated everything, and enough growing capacity to supply a farmers market stand. If monotubs are apartments, Martha tents are high-rise condos for mushrooms.

System Components
Building a Martha is like assembling the Avengers of mushroom equipment:
The Foundation:
– Greenhouse tent or wire rack with plastic sheeting ($60-150)
– Think 4-tier metal shelving unit wrapped in clear plastic, or spring for a actual mini greenhouse
The Life Support:
– Ultrasonic humidifier ($30-50) – The kind that makes cool mist, not your grandma’s steam machine
– Inline fan for air exchange ($20-40) – 4-inch duct fans work perfectly
– Timer outlets ($20-30) – Because nobody wants to manually run equipment 24/7
– Hygrometer ($10-20) – Know your numbers or guess and stress
All in, you’re looking at $140-290 to go from zero to automated mushroom factory. Not bad for something that can produce pounds weekly.
Automation Advantages
This is where Martha tents absolutely destroy the competition. Set your timers once, and you’re basically running a mushroom farm on cruise control. Humidifier kicks on for 30 seconds every 10 minutes? Done. Fan runs for 5 minutes every hour? Set it and forget it.
This automation is a godsend for finicky species. Growing reishi that needs high CO2 during antler formation? Dial back the fan. Cultivating chestnut mushrooms that demand perfect humidity? Your ultrasonic fogger has got your back.
Scaling Possibilities
Here’s where things get exciting. Started with two shelves? Add two more. Maxed out your 4-tier? Get another tent. Before you know it, your spare bedroom looks like a commercial grow operation (because it basically is).
The beauty is in the mix-and-match potential. Top shelf running oysters, middle shelf cranking out shiitake, bottom shelf dedicated to lion’s mane. As long as they like similar temperature and humidity, you’re golden. It’s like running multiple monotubs but with shared infrastructure—efficiency that would make Jeff Bezos jealous.
Cross-Contamination Considerations
Okay, real talk—the open design is both a blessing and a curse. One contaminated block can potentially spread spores to its neighbors faster than gossip in a small town.
But don’t panic. Smart growers use the “apartment building” approach:
– Keep at least 6 inches between blocks
– Check daily and remove anything suspicious immediately
– Some paranoid (smart?) cultivators hang plastic shower curtains between shelves
– Weekly wipe-downs with isopropyl alcohol keep things clean
Think of it like this: Would you rather manage four separate monotubs or one Martha with good hygiene? Most choose the Martha.
Humidity Tent: The Budget-Friendly Option
Look, not everyone’s ready to drill 200 holes or set up timers and fans. Sometimes you just want to fruit a couple blocks without the commitment. Enter the humidity tent—mushroom cultivation stripped down to its bare essentials.
This is your “I’m not sure about this hobby yet” option, and there’s absolutely no shame in that game.
DIY Construction
You can literally build this with stuff from your junk drawer:
– Clear plastic sheeting from a paint drop cloth – $5
– Some coat hangers or PVC scraps for a frame – Free
– Tiny humidifier or just a spray bottle – $10-15
– Cheap thermometer/hygrometer – $5
Bend your coat hangers into a dome, throw the plastic over it, and congratulations—you’ve got a fruiting chamber. Is it pretty? No. Does it work? Absolutely.
Pro move: Use a clear storage tote turned upside down. Instant humidity dome with zero construction required.
Limitations and Workarounds
Here’s the thing—humidity tents are like that friend who’s great in small doses. The lack of proper air exchange means CO2 builds up fast, and your mushrooms will let you know by growing long, skinny stems reaching for oxygen.
But we can hack this:
– Cut flaps in the plastic that you can open and close
– Stick a computer fan in there (battery-powered ones are $10)
– Lift the tent for 30 seconds every few hours—call it “burping”
– Position it where natural air movement does some work for you
Is it perfect? No. But perfect is the enemy of good enough, and good enough grows mushrooms.
Best Practices
Humidity tents shine in specific situations:
Testing new strains? Perfect. Why build a whole chamber for something that might not work?
Got two blocks of lion’s mane? This is your setup. Small scale, high humidity, minimal investment.
Living in a dorm/small apartment? A humidity tent tucks anywhere and breaks down in seconds.
Total beginner? Start here. Learn the basics without the pressure of a complex system.
The key is staying engaged. This isn’t a set-and-forget situation—you’re the automation. But for many growers, that hands-on experience teaches more than any automated system ever could.
Advanced Fruiting Chamber Features
Ready to go full mad scientist? Let’s talk about the gear that separates the hobbyists from the obsessed.
Environmental Controls
Once you taste the sweet precision of digital control, there’s no going back:
Inkbird Humidity Controllers ($30-40) – Set your target RH, and this little brain keeps it there. Too dry? Triggers your humidifier. Too wet? Kicks on a fan. It’s like having a tiny mycologist watching your grows 24/7.
Temperature Controllers ($25-35) – Same deal but for heat. Hook up a heating mat for winter, a fan for summer. Your mushrooms stay in their happy zone year-round.
CO2 Monitors ($50-100) – For the data nerds. See exactly when CO2 builds up and dial in your air exchange perfectly.
WiFi Data Loggers ($40-80) – Track everything from your phone. Get alerts if something goes wrong. Show off graphs to friends who definitely didn’t ask.
Yeah, you might drop $50-200 on gadgets, but when you nail consistent 25% biological efficiency, you’ll understand why people go down this rabbit hole.
Lighting Considerations
Mushrooms don’t need light to grow, but they do use it as a directional cue. Without it, you get mushrooms growing sideways, upside down, or in weird pretzel shapes.
Here’s what works:
– Basic LED strip lights in 6500K (daylight) – $15
– 12 hours on, 12 hours off mimics nature
– They only need enough light to read a book by—we’re not growing weed here
– Put them on the same timer as your fans for one less thing to manage
Fun fact: Blue light specifically triggers pinning in many species. It’s like an alarm clock for mushroom formation.
Substrate Support Systems
The unsung heroes of any good fruiting chamber:
Wire Cooling Racks – Elevate your blocks for 360-degree fruiting. Restaurant supply stores sell them cheap.
Metro Shelving – Adjustable heights for different sized bags. Plus, they’re rated for serious weight.
Drip Trays – Because nobody likes cleaning mushroom juice off the bottom of their chamber. Dollar store baking sheets work perfectly.
Plastic Sheeting – Line everything. Future you will thank present you when cleaning time comes.
The goal? Make everything modular, cleanable, and foolproof. Because at 2 AM when you’re harvesting your biggest flush ever, you don’t want to be problem-solving.
Choosing Your Perfect Fruiting Chamber
Alright, decision time. Here’s the no-BS breakdown of what works for whom.
Species-Specific Recommendations
Oyster mushrooms are like that friend who needs constant fresh air—SGFC or Martha tent all day. These oxygen lovers will suffocate in anything less.
Shiitake wants it humid but not stagnant. SGFC with religious misting keeps those blocks producing picture-perfect mushrooms with that classic umbrella shape.
Lion’s Mane is a diva about humidity. We’re talking 85-95% or it throws a tantrum. Humidity tent for small grows, automated Martha for serious production.
Reishi plays by different rules. It actually LIKES some CO2 buildup during its antler stage. Monotub or Martha with adjustable air works magic here.
Research specimens (wink wink, microscopy fans) thrive in monotubs. Consistent conditions, minimal fuss, maximum data reliability.
Space and Budget Analysis
Living in a shoebox?
Humidity tent slides under your bed. Small SGFC fits in a closet. Don’t let space stop you.
Got a spare corner?
This is monotub territory. Stack ’em three high if you’re feeling ambitious. Or go Martha tent for variety.
Blessed with a garage/basement?
The world is your oyster (mushroom). Multiple Marthas, monotub armies, or go full commercial with a dedicated grow room.
Money situation:
– Ramen budget ($20-30): Basic SGFC or DIY humidity tent
– Craft beer budget ($50-150): Automated monotub or starter Martha
– Champagne dreams ($200+): Fully automated everything with bells, whistles, and WiFi
Skill Level Matching
Never grown before?
SGFC teaches you everything. You’ll learn to read your mushrooms, understand humidity, and develop intuition. It’s like learning to drive stick before getting an automatic.
Got a few grows under your belt?
Time for monotubs. You understand the basics, now let automation handle the grunt work while you focus on perfecting your technique.
Mushroom maestro?
Martha tent is your playground. Run experiments, grow multiple species, push boundaries. This is where cultivation becomes art.
Eyeing farmers markets?
Multiple Marthas or custom room builds. But honestly, if you’re here, you already know what you need.
Common Fruiting Chamber Mistakes to Avoid
Time for some tough love. These are the mistakes that’ll have you posting sad mushroom pics asking “what went wrong?”
Over-Misting Syndrome
We get it—you’re excited. But drowning your mushrooms in love (water) is the fastest way to kill them. Here’s what happens when you go spray-bottle crazy:
– Bacterial blotch turns your beautiful caps into slimy nightmares
– Stems get weak and stretchy like overcooked noodles
– Caps stay tiny because they’re too busy not drowning to grow properly
– Your substrate becomes a swamp where only sadness grows
The fix? Mist the walls, not the mushrooms. You want thousands of tiny droplets creating humidity, not puddles. If you see water pooling anywhere, you’ve gone too far. Remember: mushrooms are 90% water—they don’t need to swim in it too.
Insufficient Air Exchange
Your mushrooms are literally suffocating, and they’re showing it:
– Fuzzy feet? That’s aerial mycelium screaming for oxygen
– Stems like pencils reaching for the sky? They’re desperately seeking fresh air
– Tiny caps on giant stems? Classic CO2 poisoning
– Growth grinding to a halt? They’ve given up
The solution depends on your setup. SGFC? Drill more holes or move it somewhere with better airflow. Monotub? Loosen that polyfill or add another air port. Martha? Crank up the fan cycles. Your mushrooms should look like mushrooms, not alien lifeforms.
Temperature Fluctuations
Mushrooms hate surprises. That sunny window spot? Your heating vent? That uninsulated garage? All terrible choices.
Keep it steady between 65-75°F, and your mushrooms will reward you. Wild swings stress the mycelium, trigger early pinning, or worse—stop fruiting entirely.
If your space runs cold, a small heater on a controller works. Too warm? A fan usually does the trick. But whatever you do, don’t overcorrect. Slow, steady changes beat dramatic swings every time.
Neglecting Sanitation
This is the one that’ll break your heart. You do everything right, get beautiful mushrooms, then BAM—green mold everywhere on the second flush.
Here’s your cleaning routine that actually works:
– Remove aborts (those tiny mushrooms that stopped growing) immediately—they’re contamination magnets
– Between flushes, wipe down walls with 10% bleach solution or 70% isopropyl
– Use clean water for misting (not straight from the tap if you can help it)
– Wash your hands before handling anything—pretend you’re a surgeon
Contamination is part of the game, but good hygiene keeps it from becoming the whole game.
Maximizing Your Fruiting Chamber Success
You’ve got your chamber. Now let’s make it sing.
Dial In Your Environment
Every location is different. What works in humid Florida fails in dry Colorado. Here’s how to find your sweet spot:
Week 1: Baseline
Run everything by the book. Take notes like a scientist—humidity readings, mushroom appearance, growth rates. This is your control group.
Week 2: Tweak One Thing
Maybe add five minutes to your fan timer. Or move your chamber two feet left. Change ONE variable and watch what happens. Your mushrooms will tell you if they like it.
Week 3: Refine
Based on what worked (or didn’t), make another small adjustment. Getting better results? Keep going in that direction. Worse? Back it up.
Document Everything
That notebook isn’t just for show. “Increased FAE from 5 to 7 minutes/hour = 20% larger caps” is data gold. Build your own growing manual specific to your space.
Upgrade Strategically
Don’t upgrade everything at once—that’s how you end up with expensive confusion. Target your weakest link:
Tired of daily misting? Automation first—get that humidifier and timer.
Fuzzy feet problems? Air exchange upgrade—add a fan or drill more holes.
Flying blind? Monitoring equipment—know your numbers before changing them.
Maxed out production? Then and only then, expand capacity.
Each upgrade should solve a specific problem. “Because it’s cool” is a valid reason, but know that going in.
Join the Community
Growing alone is like dancing by yourself—possible, but way more fun with friends.
Online Forums – Where chamber porn lives. Someone’s always posting a clever modification that’ll blow your mind. Shroomery, Reddit’s r/unclebens, and countless Facebook groups are goldmines.
Local Mycology Clubs – Nothing beats seeing someone’s setup in person. Plus, culture trades are the best way to expand your library.
Social Media – Instagram mycology is surprisingly wholesome. Tag your grows, share your wins, troubleshoot your failures. The community is incredibly supportive.
Take a Class – Online or in-person, structured learning accelerates your progress. One good workshop can save months of trial and error.
The Future of Fruiting Chambers
Hold onto your butts—the future of home cultivation is getting wild:
Smart Chambers – We’re already seeing WiFi-connected setups you control from your phone. Humidity dropping while you’re at work? Adjust it from the break room.
AI Optimization – Machine learning algorithms that analyze your grow data and automatically adjust parameters. Your chamber literally learns how to grow better mushrooms over time.
Contamination Detection – Imagine cameras that spot green mold before your eyes can, alerting you to remove that block before it spreads. It’s coming.
Robotic Harvesting – Still sci-fi for home growers, but commercial operations are testing arms that pick mushrooms at perfect maturity. Give it five years.
Eco-Friendly Everything – Solar-powered chambers, recycled materials, water recapture systems. Growing mushrooms while saving the planet? Yes please.
The barrier to entry keeps dropping while the ceiling keeps rising. What a time to be alive and growing fungi.
Your Fruiting Journey Starts Now
Look, I could talk fruiting chambers all day (and apparently just did), but here’s the bottom line: The best chamber is the one you actually build and use.
Maybe you’re eyeing that plastic tub in your garage right now, thinking about drilling some holes. Or perhaps you’re sketching out plans for a fully automated Martha setup. Either way, you’re about to embark on one of the most rewarding hobbies on the planet.
Start where you are. Use what you have. Do what you can. That first harvest—when you hold mushrooms you grew from basically nothing—hits different. It’s addictive in the best way.
Whether you’re diving into cultivation with our liquid cultures (3x faster colonization, just saying) or exploring the microscopic world with our spore syringes, remember this: Every master cultivator started exactly where you are right now.
Your spare closet? It’s not just storage anymore. It’s potential. Your garage corner? Prime real estate for a mushroom operation. That weird space under the stairs? Monotub central.
The mushrooms are out there, waiting to be grown. Your perfect fruiting chamber is waiting to be built. And trust me—once you harvest your first flush, you’ll wonder why you waited so long to start.
So what are you waiting for? Those mushrooms won’t grow themselves. Well, technically they will, but not without the right chamber. You know what to do.
Let’s grow.